 Birch Bay Siding
 Birch Bay Village is one of the established neighborhoods in the Birch Bay area of Whatcom County, and its housing stock tells its own story. A good share of the homes here started out as smaller seasonal or vacation cottages, many of them added onto or converted for year-round living over the years, sitting alongside newer construction built to a different standard. That mix matters for siding replacement specifically, because the original siding on an older cottage was never engineered for the coastal exposure this neighborhood actually gets, and even a competent re-side done a couple decades ago is often reaching the point where patching no longer makes sense.
We treat siding replacement in Birch Bay Village as its own kind of project, not a smaller version of siding work done a few miles inland. Salt air, wind-driven rain, and a moss season that can run most of the year all shape which failures show up first, what needs attention underneath the old siding before anything new goes up, and which products are worth installing in this specific setting.
Why Siding Replacement Comes Up So Often in This Neighborhood
Two things overlap in Birch Bay Village that don't always overlap elsewhere in Whatcom County: older housing stock and sustained coastal exposure. A cottage built decades ago as a seasonal getaway was typically sided with whatever was standard and affordable at the time — often cedar, sometimes an early composite or engineered wood product — and none of those choices were made with a full-time, waterfront-adjacent lifestyle and decades of salt air in mind. Homes that have since been converted to year-round residences are asking more of that original siding than it was ever designed to give.
On newer construction in the neighborhood, the siding is usually a better match for the climate to begin with, but installation quality still varies. We've seen re-sides in this area fail early not because the product was wrong, but because flashing, fastening, or clearance details were rushed. Either way, by the time a homeowner calls about replacement, the siding has usually been telling them something for a while.
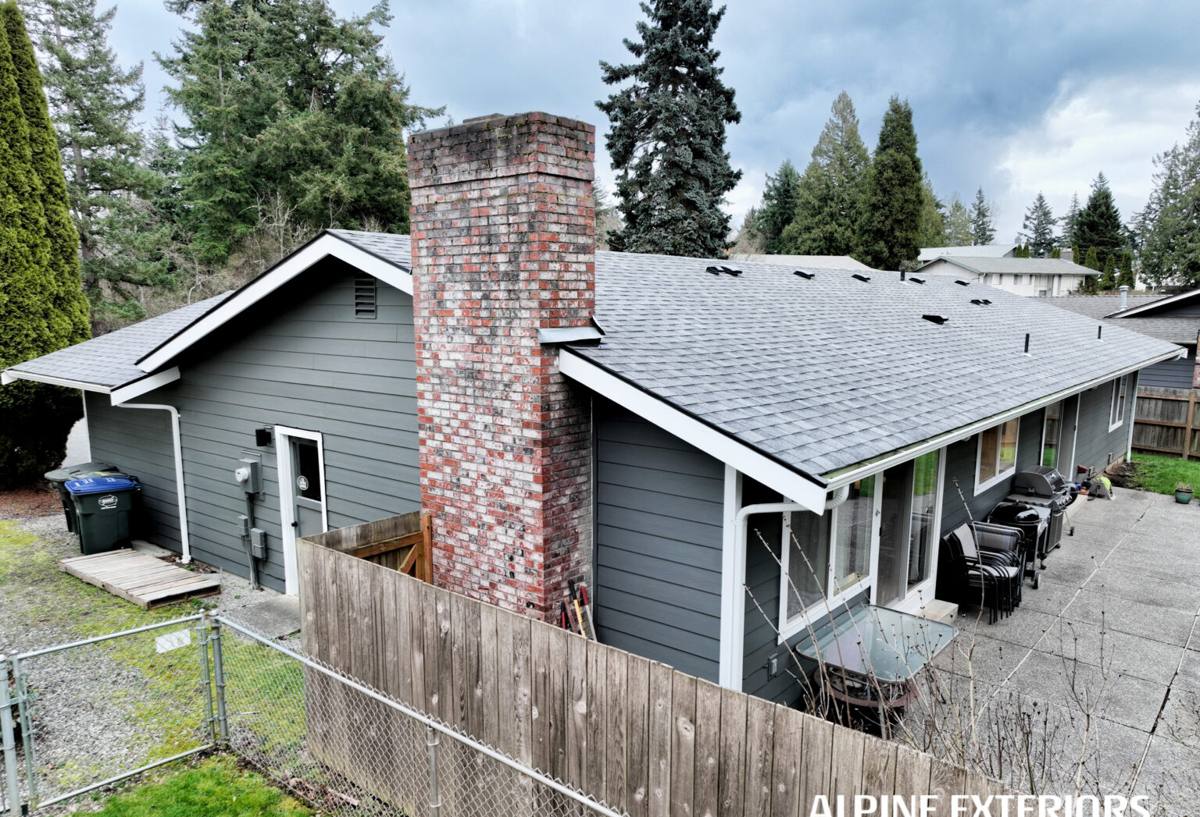
What the Local Climate Does to Siding Here
Salt Air and Corrosion
Birch Bay Village sits close enough to the water that salt-laden air is a constant, not an occasional condition. Salt accelerates corrosion in fasteners, flashing, and lower-grade hardware, and it breaks down weaker paint and finish systems faster than a drier inland location would. Any siding replacement here needs corrosion-resistant fasteners and trim as a baseline, not an upgrade.
Driving Rain and Wind-Driven Moisture
Waterfront-adjacent exposure also means more wind, and wind-driven rain behaves differently than a straight-down rainfall. It gets pushed sideways into wall assemblies, laps, and seams that were only ever designed to shed water moving downward. Siding and the moisture barrier behind it both have to account for that sideways push, especially on walls facing the water or open exposure.
The Long Moss Season
Mild temperatures, shade, and near-constant dampness add up to a moss and mildew season that can run most of the year across this part of Whatcom County. North-facing walls and anything shaded by trees or a neighboring structure tend to show growth first, and any siding material that's porous or holds moisture against the substrate becomes a growth surface over time. That's a maintenance and durability issue as much as a cosmetic one.
Repair or Replace? Signs Your Siding Has Reached the End
Not every issue means full replacement — some problems are legitimately repairable. But in Birch Bay Village, a handful of signs usually mean it's time to stop patching:
- Soft, spongy, or crumbling siding when pressed, especially near the bottom courses or under windows
- Persistent moss or mildew that comes back within a season or two of cleaning, particularly on north-facing walls
- Visible warping, cupping, or buckling panels, common on older wood-based or engineered wood siding after repeated wet cycles
- Paint or finish that's peeling, chalking, or failing across large sections rather than one isolated spot
- Interior signs — water staining, musty smell, or soft drywall near exterior walls — that point to moisture getting past the siding
- Rot at trim boards, corner boards, or anywhere siding meets a window, door, or roofline
- Siding that's simply original to a decades-old cottage and was never rated for this kind of coastal exposure to begin with
If you're only seeing one or two of these in a limited area, targeted repair may still make sense. Once several of these show up together, or the underlying sheathing is compromised, replacement is usually the more honest recommendation, not just the more profitable one.
What a Correct Siding Replacement Involves
Tear-Off and Inspection
Replacement starts with removing the existing siding, not covering over it. That's the only way to actually see the sheathing, framing, and existing moisture barrier underneath, which matters a lot on an older Birch Bay Village cottage where hidden damage is common. We inspect as we go rather than assuming what's underneath matches what the exterior suggested.
Repairing What's Underneath
Tear-off routinely uncovers soft or rotted sheathing, damaged framing, or a moisture barrier that's failed or was never installed correctly in the first place. None of that can be sided over and expected to hold up. We address what's found before any new siding goes on, and we'd rather have that conversation honestly at this stage than let a homeowner discover it years later as a bigger, more expensive problem.
Moisture Barrier and Flashing
Given the driving rain this neighborhood sees, the weather-resistive barrier and flashing details behind the siding matter as much as the siding itself. That means correctly lapped house wrap or building paper, proper flashing at every window, door, and roof-to-wall transition, and drainage detailing that lets any moisture that does get past the siding find its way back out instead of sitting against the wall.
Installing to Manufacturer Spec
Whatever product goes on the wall only performs the way it's supposed to when it's installed to the manufacturer's actual specifications — correct fastener type and spacing, proper clearance from grade, decks, and roof lines, and joints that are factory-mitered or properly sealed rather than caulked and hoped for. A good product installed loosely will still develop problems in this climate.
Why We Install Only James Hardie Fiber Cement in This Neighborhood
We don't install LP SmartSide, vinyl siding, Cemplank, Allura, primed spruce, or cedar. That's a professional standard we've settled on, not a knock on every homeowner who's had a good experience with one of those products elsewhere. In a climate like Birch Bay Village's — sustained salt air, sideways rain, and a moss season that doesn't really end — the trade-offs with those materials show up sooner and cost more to manage than they would somewhere drier and calmer: vinyl can distort under heat and its seams are exposure points; engineered wood products are moisture-sensitive at cut edges and joints; cedar and primed wood absorb and release moisture readily and need consistent refinishing to hold up.
James Hardie fiber cement is dimensionally stable, so it doesn't swell, warp, or cup the way those materials can after repeated wet cycles. The ColorPlus finish is baked on at the factory rather than applied on site, which holds up longer against fading and chalking in salt air. Hardie's HZ5 formulation is built specifically for regions with heavy moisture exposure, which describes waterfront Whatcom County well, and it's non-combustible, which matters for safety regardless of climate. It's also backed by a strong transferable warranty, provided the installation follows Hardie's spec — which is exactly why the installation details above aren't optional for us.
What Drives the Cost of a Siding Replacement
| Factor | Why It Matters |
|---|---|
| Home size and wall area | More square footage means more material, labor, and time regardless of product choice |
| Condition underneath the old siding | Rotted sheathing or damaged framing found during tear-off adds repair cost before new siding goes on |
| Number of existing layers | Older cottages sometimes have siding installed over previous siding, which adds tear-off time and disposal cost |
| Trim and architectural detail | Corner boards, window and door trim, and transitions all add labor beyond flat wall coverage |
| Accessibility | Steep roof lines, tight lot lines, or limited equipment access can add time to any exterior project |
| Product line and profile | Lap width, texture, and color selection within the Hardie lineup affect material cost |
| Moisture barrier and flashing repair | A failed or missing weather-resistive barrier found underneath adds scope, but skipping this repair isn't a real option |
We won't quote a number without seeing the walls in person, since the condition underneath the old siding is the single biggest variable on an older Birch Bay Village home. What we can promise is an honest walk-through of which of these factors actually apply to your house before you commit to anything.
Our Siding Replacement Process
- On-site assessment — we walk the exterior, look at how the current siding has held up, and check for visible signs of moisture, rot, or failed flashing
- Honest recommendation — repair, partial replacement, or full re-side, explained with the reasoning behind it, not just a default answer
- Written scope and timeline — a clear plan before any tear-off begins, including how findings underneath the old siding will be handled if they change the scope
- Tear-off and inspection — old siding comes off, sheathing and framing get inspected, and any hidden damage gets flagged before covering it back up
- Repair and moisture barrier installation — damaged sheathing gets replaced and a correctly lapped weather-resistive barrier goes on before siding starts
- Siding installation — James Hardie fiber cement installed to manufacturer spec, with fastening, clearance, and flashing details built for this specific exposure
- Final walkthrough — we go over the finished work and the warranty coverage before calling the job complete
Why a Local Birch Bay Village Crew Matters
Manufacturer installation guidance is written for average conditions in a moderate climate, and Birch Bay Village doesn't offer average conditions. A crew that actually works this stretch of Whatcom County coastline regularly has torn old cedar and engineered wood siding off enough older cottages to know where hidden rot tends to hide, how much lap a flashing course needs given the wind here, and which walls need extra drainage detailing because of shade and moss exposure rather than sun. That's the kind of judgment that doesn't come from a spec sheet — it comes from having done the work in this specific neighborhood before.
What to Ask Before Hiring for Siding Replacement
- Ask what they find during tear-off on similar older homes in this neighborhood, and how they handle it when sheathing or framing needs repair
- Confirm current Washington contractor licensing and active insurance
- Ask how they detail flashing and moisture barrier work for wind-driven rain specifically, not just a general answer
- Get a written scope of work, including how unforeseen repairs found during tear-off will be priced
- Ask what warranty coverage applies to both the siding product and the installation labor
If your Birch Bay Village home's siding is showing its age, or you just want an honest read on whether repair or full replacement makes more sense, we're happy to walk the exterior with you. We offer free, no-pressure estimates for siding replacement in Birch Bay Village and the surrounding area — use the form below to get a time on the schedule.